Adobe Cc Process Continues to Run in Backgroud
Creative Cloud (opens in new tab) offers you more flexibility and efficiency in your design workflow than ever before. The combination of truly integrated apps and services along with the ability to sync your settings and work make it easier to work faster, wherever you are.
Whether you're designing for print, digital or both, the tools and services that come as part of a Creative Cloud membership enable you to not only deliver your projects in more style, but get client and peer feedback along the way. Here, we bring you 50 tips on making the most of CC, whatever your creative goals or discipline…
01. Synchronise your settings
One of the most convenient features of Creative Cloud is the ability to sync your settings across different installations. This feature is available in most of the CC apps, so make an effort to go to the Preferences panel in each and enable synchronising to automatically keep your workspace up-to-date, regardless of the machine you're using.
When viewing or editing a file in Creative Cloud, click Share on the upper-right corner of your screen, then choose Post Publicly. Or, in Illustrator CC or Photoshop CC, select File>Share to Behance, or click the Share icon in the lower-left corner. If you haven't yet linked your Creative Cloud membership with Behance, you will be prompted to either log into your Behance account or create an account.
03. Use Camera Raw as a plugin
Save some serious editing time by using the same powerful Camera Raw pre-processor as a live smart filter inside Photoshop. Simply choose it from the Filters menu with a layer selected to open up the familiar Camera Raw dialog. As it's a smart filter, you can mask, deactivate and change settings later too - perfect for trialling different treatments.
04. Use Photoshop to prototype responsive designs
Photoshop CC now features Adobe Generator: a handy workflow tool that enables you to export Photoshop mockups directly to Adobe Edge ReFlow, the responsive design app. You can create an Edge ReFlow project from your Photoshop document by navigating to File>Generate and choosing Edge ReFlow Project.

Adobe Premiere Pro CC features a neat way to package up individual assets and pass them over to SpeedGrade for colour treatments. If you're working with a compressed format, simply choose File>Send to Adobe SpeedGrade to render out a DPX sequence and automatically open it in Speedgrade. If you're using a RAW format, you'll need to export an EDL file by choosing File>Export>EDL. For more on SpeedGrade, see page 28 of The Ultimate Guide To Adobe Creative Cloud (opens in new tab).
06. Accept client input
Adobe Muse is a valuable tool for creating simple websites, and by using the Creative Cloud version you can let your clients edit their websites directly via the web browser. Simply choose File>Site Properties, and tick the Enable In-Browser Editing checkbox to turn the feature on.
07. Save to Cloud
You can quickly save any of your files to the cloud by using the new CC File Sync feature. Currently this functionality is in beta testing, so sign up here (opens in new tab) if you haven't already. Now whenever you save a file into the Creative Cloud Files folder, the file will be automatically uploaded and made available to you via www.creativecloud.com (opens in new tab) and any other computer you sign into via Creative Cloud.
08. Browse fonts in Dreamweaver
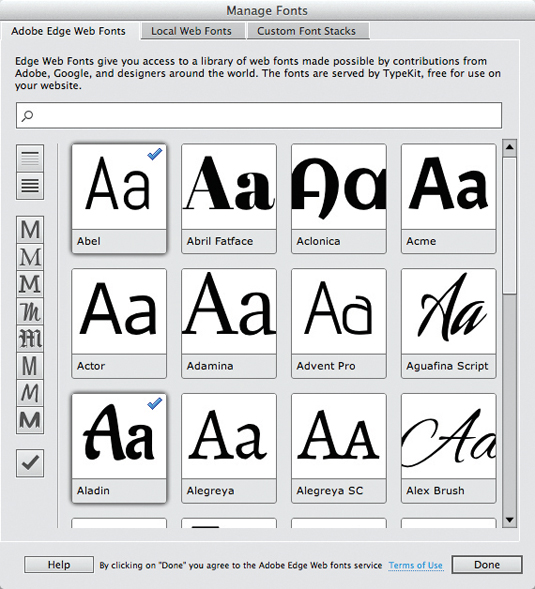
Dreamweaver CC has a built-in web font browser: Edge Web Fonts. Choose Modify>Manage Fonts, then browse through the list of available typefaces under the Adobe Edge Web Fonts tab. Once you've found one you like, click to add a tick and hit Done.
09. Copy CSS styles directly from Photoshop
In Photoshop CC you can now easily copy and paste CSS code based on a selected layer, including typography-related styles, drop shadows and rounded corners. Go to Layer>Copy CSS to copy all relevant styles ready for pasting into Dreamweaver.
10. Get Kuler themes in Illustrator
In Creative Cloud, when you sign into Kuler and create a new swatch, it's sent to Illustrator CC. If you've got Illustrator open, sign into CC, open the Kuler panel and then refresh it to see any new sets of swatches added since you opened the app.
11. Use Typekit in ReFlow
Edge ReFlow supports Typekit as part of its wider support for web fonts. To access a Typekit kit within ReFlow, simply select a block of text and click on the Typeface button in the Properties panel. Select Manage Fonts, and choose between Edge Web Fonts, or enter your Typekit kit ID to share that specific kit with ReFlow.
12 Work with C4D files in After Effects
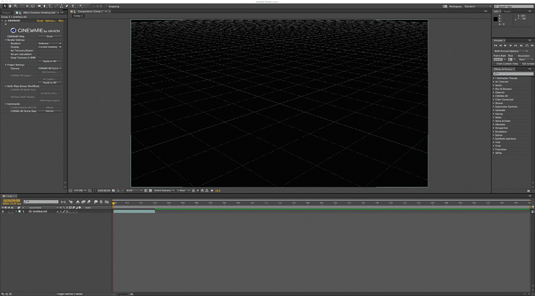
After Effects CC lets you work natively with Cinema 4D files. Simply drag a .c4d file into your project to start using it. You can perform minor edits on your 3D scene even if you don't have the full version of Cinema 4D. You can also launch Cinema 4D Lite to generate a new scene directly by choosing the Cinema 4D option under the Layer menu.
13. Create a Premiere Pro sequence from clip
Inside Premiere Pro CC you can save a lot of time while setting your project up by importing video clips to the project bin, right-clicking on a clip and choosing New Sequence From Clip. Premiere will automatically create a project timeline to match your clip's resolution and framerate, placing the clip at the beginning of the timeline.
14. Create an iPad app with InDesign CC
InDesign CC enables you to lay out and create apps for iPad and other touch devices. Simply create a layout and include any required interactive elements. Then, using the Folio Builder panel, click on the Create App menu option to launch an automated wizard that takes you through each step.
15. Use Typekit desktop fonts
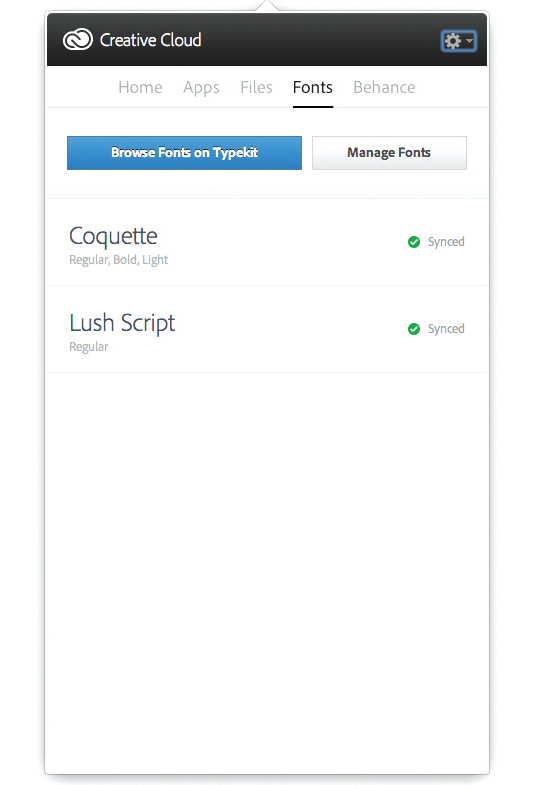
A great new feature of Creative Cloud that can speed up your workflow across all the apps is the Typekit desktop font service. As we explained on page 52, this is currently in beta-testing, although again you can sign up at https://creative.adobe.com/earlyaccess. This will also give you access to the file sync function, which lets you easily share assets across multiple computers.
16. Straighten and adjust in Lightroom
Lightroom enables you to correct lens and perspective distortion with a single click, and in a non-destructive manner. Simply select a photo and enter the develop module, then scroll down to the lens correction section. Click on one of the upright buttons to correct just vertical lines, just horizontal lines, or both.
17. Touch your type
A brilliant new feature in Illustrator CC that will save you a lot of time when working with type is the Touch Type tool. This lets you edit individual characters, changing their position, rotation and style without having to outline the type first. In short: you can make adjustments to type and retain full editability.
18. Smarter automatic processing in Photoshop
Photoshop's actions are now smarter. You can save a lot of time using actions inside Photoshop to automate common procedures – such as resizing, saving to different formats and so on. Even better, actions now support conditional logic so you can set your action to complete different tasks depending upon the scenario (whether the layer is visible or not, or layer is the background and so on).
19. Add Edge Animate projects to Dreamweaver
Dreamweaver CC can happily integrate and display Edge Animate CC projects within your web pages. In Edge, place your cursor at the point where you would like to place the project inside Dreamweaver. Go to Insert>Media>Edge Animate Composition, choose the project file and preview it in Live View to see the animation in situ.
20. Get file information online
Once you've uploaded files to Creative Cloud, you can get a lot of information about them via the creativeloud.com website. For Illustrator, InDesign and Photoshop files you can 'look inside' the file to get info about which fonts are being used, what colours appear, and more. InDesign files enable you to view individual pages within the document, too!
21. Use Adobe Exchange Manager
The Adobe Exchange panel appears in many of the core apps found in Creative Cloud, and provides quick access to a large range of extensions and plugins, including both free and commercial options. Simply go to Help>Manage Extensions to launch the dedicated app.
22. Create a video production workflow
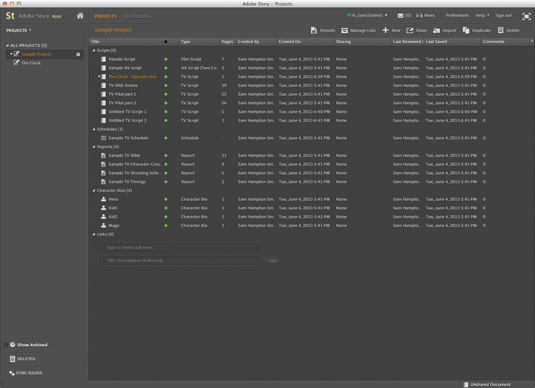
Adobe has brought together its video production tools with a much tighter integration in Creative Cloud. You can now create a script in Adobe Story and import it into Prelude to generate searchable metadata that can be automatically assigned to assets. This metadata will also flow directly into Premiere. Meanwhile, there's a handy Adobe Anywhere integration found under File>Adobe Anywhere, which permits collaborative editing.
23. Font search
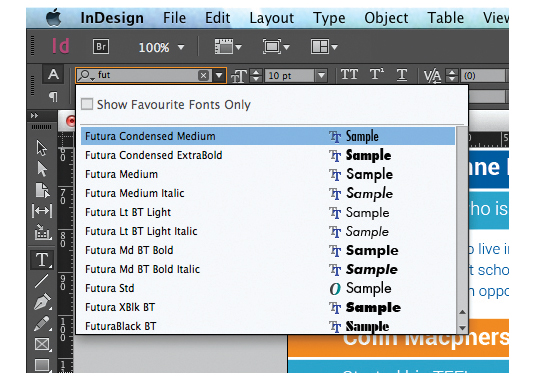
Several Creative Cloud apps have had their type engines updated as part of the update from CS6. This makes it quicker than ever to find the font you're looking for. All you need to do is start typing the name of the font you're looking for in the type panel, and you'll get a filtered list, enabling you to quickly select the correct face.
24. Create a sketch in Adobe Ideas and then complete it in Illustrator CC
Using Creative Cloud you can create a sketch using the Adobe Ideas app for your tablet, and then complete your work inside Illustrator. Simply create your sketch inside Ideas and save it to the cloud, then either navigate to the Creative Cloud website, or use the file sync function to grab the Ideas file and open it natively inside Illustrator.
25. Import colour swatches to Photoshop
With Photoshop CC you can load colour swatches directly into your workspace by opening the Swatches panel. From the drop-down menu choose Load Swatches. Navigate to an HTML, CSS or SVG file and click OK. Photoshop will read the colour values specified in the document you chose and create a new set of swatches from these.
26. Use nested styles in InDesign CC
InDesign is now far more than a simple page layout tool: you can use the app to generate mobile applications using the Digital Publishing Suite that's included with Creative Cloud. Save valuable time by automatically formatting text using nested styles. These enable you to include character styles inside paragraph styles for the automated layout of effects like drop caps and so on.
27. Patterns in Illustrator
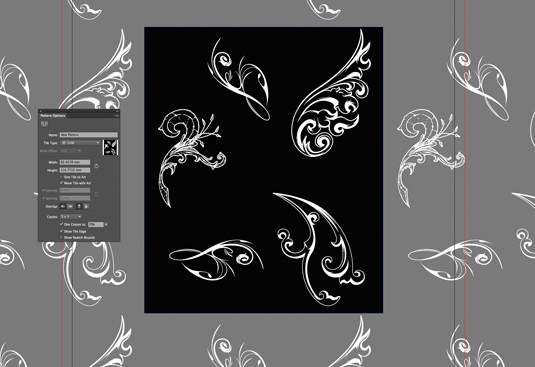
Illustrator CC has a handy pattern creation feature that can be used to create seamless backgrounds for your Dreamweaver, Photoshop and InDesign projects, as well as for use inside Illustrator itself. Simply add some artwork to a group and go to Object>Pattern>Make. Choose your settings and click Done to create your pattern. You can now apply this pattern in the same way you would any other inside Illustrator.
28. Quickly change fonts in Photoshop
If you've grabbed a new font from Typekit and synced it to your desktop, you can quickly update all your Photoshop layers to use the new font without having to select each layer one by one. Cmd/Ctrl+click each type layer, choose the Type tool and select your new typeface to apply it to all layers simultaneously.
29. Create a rough cut with Adobe Prelude
If you use Adobe Prelude as part of your video production workflow, you can export your project directly to Premiere for further work, finessing or colour treatment. You don't have to go via Premiere if you'd like to quickly create a rough cut, however. Launch Adobe Media Encoder directly from Prelude by choosing File>Export>Rough Cut to quickly output to your desired format.
30. Export layers from Illustrator to Photoshop
After you've created artwork in Illustrator you can easily export it to Photoshop while preserving layers to complete further work on your file. Go to File>Export and select the Photoshop format. Choose the resolution you'd like to work at and ensure the Write Layers option is selected before hitting OK.
31. Change ruler units
This tip works inside lots of Adobe Creative Cloud apps – not just one. For example, previously if you wanted to change the units being used inside Photoshop you might have navigated to Photoshop> Preferences>Units and Rulers (or Edit>Preferences> Units and Rulers on a PC). Instead, now all you need to do is simply right-click on a ruler and choose the new measuring unit you would like to use.
32. Easily import projects created in Edge Animate to InDesign
Edge Animate projects can be included within your InDesign DPS projects very easily, making the production of interactive elements within your apps very simple indeed. In Edge Animate CC, choose a poster image by clicking the camera icon in the Properties panel. Now all you need to do is publish in the OAM format to generate a project that is compatible with InDesign CC.
33. Unembed images in Illustrator
If you have copied and pasted images into an Illustrator document from Photoshop, the web or another application, you can easily unembed them all simultaneously if you find yourself in a situation where you need to. Simply select any images you wish to unembed and click the Unembed button in the control panel to generate links to your document instead.
34. Add closed captions to video
Adobe Premiere Pro CC includes a handy closed captioning feature that enables you to either import captions or create them from scratch directly inside Premiere. You can adjust the size, position and colour of captions and export them as a separate file or embedded within your output. Choose Window>Captions to get started.
35. Generate CSS transitions in Dreamweaver
Dreamweaver integrates particularly nicely with Edge Animate, but if all you want to do is create a basic CSS transition, there's no need to generate a separate animation project. Simply choose the element that you would like to animate, and open the CSS Transitions panel to apply a set of properties and rules to your element.
36. Generate QR codes in InDesign
Depending on your audience, QR codes can provide a nice way to point smartphone users to your website without them having to manually type a URL into their browser. InDesign CC enables you to generate QR codes easily without having to use a third-party service. Simply create a frame and navigate to Object>Generate QR code. Choose Web Hyperlink as the type, and copy and paste your URL into the URL field.
37. Quickly create an automatic slideshow in Premiere Pro CC
Working with static images inside Premiere is now easier than ever. Import a folder of images into your project, and click, drag or drop them into the order you would like to use within the bin. Select all your images and choose the Automate to Sequence button at the bottom of the bin to generate a slideshow with default transitions in place.
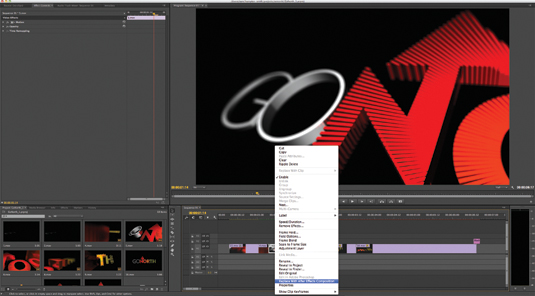
Premiere Pro works well with After Effects. It's now very simple to substitute a standard piece of footage with an After Effects composition of the same length, resolution and frame rate. From your timeline, right-click on a clip and choose Replace With After Effects Composition to generate a new project with matching properties.
39. Editable shapes in Photoshop
Smart Objects are a great way to include advanced vector artwork from Illustrator inside your Photoshop document, but if you just want a basic vector shape, Photoshop CC now enables you to generate editable rounded corners on standard shapes. Open the Properties panel with whichever shape tool is active to gain access to editable corners at any stage.
40. Export video and HTML from Flash CC
Although you can export from Flash in the traditional SWF format, most smartphone devices don't support the native Flash file. Instead you can export as HTML and video, ready for deployment directly into a Dreamweaver or Muse project. This export option includes support for timeline animations, making Flash a useful additional tool in the Creative Cloud toolkit for web designers.
41. Remove camera shake

After Effects CC includes newly improved motion stabiliser functionality for automatically removing camera shake on your video clips. For still images, Photoshop now also includes a camera shake and blur reduction filter. You'll find the option under the Sharpen section in Photoshop's Filter menu.
42. Use Edge Code for code-only projects
If you want a simple code editor that doesn't include all the bells and whistles found within Dreamweaver, it's well worth having a look at Edge Code, which is available as part of your Creative Cloud subscription. This basic editor offers nice syntax highlighting and some useful productivity benefits. In addition, it's also fully compatible with projects created in Dreamweaver.
43. Inspect your website everywhere
Edge Inspect enables you to debug a website created in Dreamweaver or Muse, both on a desktop or on mobile devices, such as your iPhone or iPad. Simply Install Edge Inspect from Creative Cloud for your computer, then grab the Chrome plugin and download the iPad app to get started. It's as simple as that.
44. Write with Story, shoot with Prelude and monitor with iPad
The video production workflow process facilitated by Creative Cloud provides you with a lot of power and control during the writing and shooting phase. You can easily script using Adobe Story before importing this to Prelude to shoot your footage. You can now also monitor progress and log data using the iPad Prelude CC Live Logger app. All the data that you capture is accessible in Premiere when you're in the edit too.
45. Profile performance with Scout
Adobe Scout offers a straightforward way to profile and performance-test SWF games that have been output from Flash. Scout lets you monitor and report on performance either from a desktop or mobile device where you've deployed AIR runtime. Navigate to www.creativecloud.com and download Scout to begin testing.
In the same way that Photoshop now enables you to export CSS, Illustrator also has a similar capability. Design your assets inside Illustrator as usual, then open the CSS Properties panel to view all compatible visual characteristics rendered as CSS code ready for copying and pasting into Dreamweaver. This works with CSS gradients, so it's a handy way to generate gradient backgrounds.
47. Record and embed audio
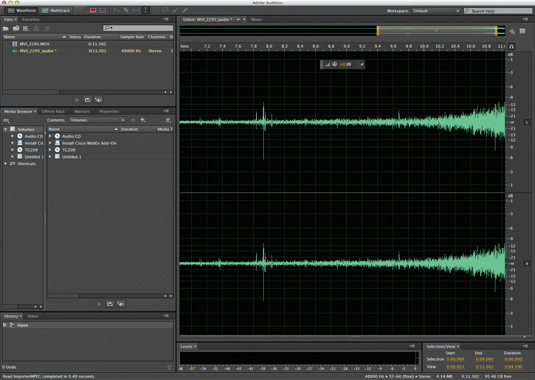
Adobe Audition is included with Creative Cloud. Audition makes it easy to move audio quickly in and out of your Premiere Pro and After Effects projects, and includes support for multi-track files. Send audio to Audition from Premiere by right-clicking on the track and choosing Edit in Adobe Audition> Sequence. You can also export a preview video at the same time to set cue points.
48. Publish to ePub from InDesign
InDesign CC has a great range of ePub publishing tools for exporting your document in a format compatible with eReaders and bookstores, including the likes of Apple's iBookstore, Barnes & Noble's Nook and Kobo. You can also now embed fonts within your ePub files, subject to the usual licensing restrictions. Navigate to File>Export and choose the ePub format to get started.
49. Publish websites with Business Catalyst
You can instantly deploy a new Dreamweaver or Muse project to the web using the Business Catalyst hosted platform offered as part of the Creative Cloud service. Both web development apps offer a full integration that allows for single-click publishing.
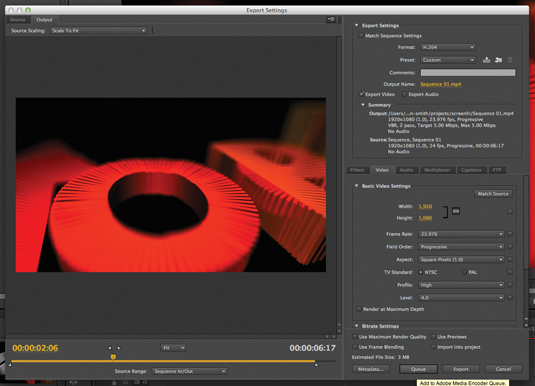
Adobe Premiere Pro CC and After Effects CC now use Adobe Media Encoder (AME) as their primary output module, enabling you to continue working while your files are rendered in the background automatically. Simply export your work in the usual way, and choose the (now default) AME option to pass the rendering job off to be encoded.
This article first appeared in The Ultimate Guide To Adobe Creative Cloud (opens in new tab) .
Now read these:
- Designers speak out about Adobe's Creative Cloud
- New tools in Adobe Creative Cloud: 12 revealing videos
- Free Photoshop actions (opens in new tab) to create stunning effects
schumanntandsold80.blogspot.com
Source: https://www.creativebloq.com/creative-cloud/tips-faster-working-creative-cloud-10135011
Postar um comentário for "Adobe Cc Process Continues to Run in Backgroud"